How to Shoot Powerful, Cinematic Portraits in Any Location (With Just Two Lights)
- austenhunter
- Dec 24, 2025
- 4 min read
Most photographers walk into a graffiti-covered warehouse and see problems: harsh shadows, uneven light, and backgrounds that feel impossible to control. But when you understand how to shape light — instead of letting the environment dictate your results — even a location like this becomes a creative gift.
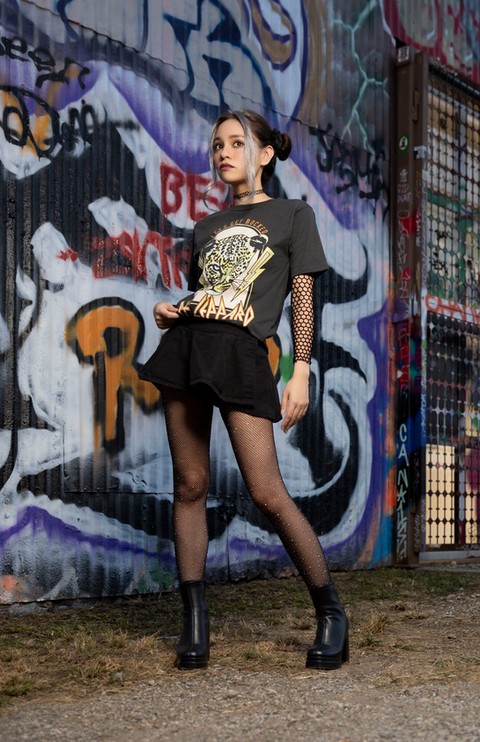
On a recent trip to Dallas, I visited the Fabrication Yard, a sprawling outdoor graffiti space that’s become a canvas for local artists. The moment I stepped inside, I knew it was perfect for a hip-hop–inspired portrait session with my friend and model, Leorosa. The colors, the textures, the grit — it all had context, and context is a powerful storytelling tool for portrait photographers.
Why Location Choice Matters in Cinematic Portrait Photography
A portrait becomes more compelling when the environment says something about the subject. Whenever possible, I choose locations that offer a mood, a tone, or even a subtle narrative. At the Fabrication Yard, the graffiti walls told the story before the first frame was shot — all I had to do was light it with intention.
With a location selected, I picked two outfits for Leo that made sense inside that environment:
A baggy, hip-hop-inspired look
A gothic, punk-inspired aesthetic
The outfits served the story, and the story served the images.


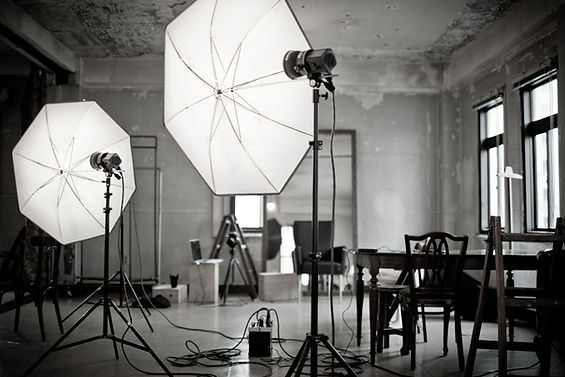
How to Light a Difficult Location With Off-Camera Flash
Difficult locations don’t fail because they lack character — they fail when the light is left uncontrolled. By using off-camera flash, you separate the exposure of your subject from the exposure of the environment, giving you full authority over contrast, depth, and mood. Instead of reacting to bad light, you build the scene intentionally, shaping both the subject and the background to serve the story you’re trying to tell.
Cinematic Portrait Lighting Gear Used on This Shoot
Item | Type | Link |
Godox AD400 Pro | Flash Unit | |
Godox AD200 Pro | Flash Unit | |
36" Glow EZ-Lock Softbox | Lighting Modifier | |
28" Deep Parabolic Softbox | Lighting Modifier | |
Photoflex Lightreach Plus | Lightstand | |
Canon RF 28-70mm F/2 | Lens |
Building Exposure Step-by-Step for Cinematic Portraits
The Fabrication Yard has deep shadows and little usable ambient. So I lit it in layers:
Step 1: Expose for the Ambient First
The warehouse interior was nearly black, so I used the AD200 to lift the background before touching the key light.
Step 2: Add the Key Light on the Subject
Once the environment had shape and detail, I brought in the AD400 to light Leo. This gave me complete control over contrast, depth, and the visual mood of the scene.
Why Using a Second Light Creates More Cinematic Depth
Without a background light, Leo melts into the shadows. With it, she becomes dimensional — separated, sculpted, and present. That’s cinematic portraiture.


How to Shoot Motion With Flash Photography
Leo wanted to bring some dance movement into the next scene. Motion introduces new challenges — and that means adjusting your lighting approach.
Two Rules for Shooting Action With Strobes
1. Lower your flash power.
Lower power = faster flash duration + quicker recycle times. You can fire in short bursts and actually capture the decisive moment.
2. Raise ISO to compensate.
Your strobe is doing less work, so your camera needs to do a little more.
Result: sharp, dynamic action portraits that still feel intentional and crisp.


If you’re new to flash, this can feel overwhelming — but it’s no more complicated than learning manual mode. Start with one light, build consistency, and then move to two.
Using Color Gels to Add Mood to Portrait Lighting
We moved into a room filled with steel pillars — the perfect opportunity to use gels. Leo had switched to a red outfit, so I dropped a blue gel onto the AD200 to create a clean complementary color contrast.
My Color Gel Lighting Approach
Aim the gelled light at the ceiling, not the wall
Let it bounce to create a soft color wash
Avoid hotspots or hard edges
Keep the key light clean and consistent
The color transformed the entire atmosphere — subtle, cinematic, intentional.


Creating Dramatic Portraits During Blue Hour
As daylight faded, we stepped outside and transitioned into the goth/punk outfit. Blue hour can be a stressful time to shoot because:
Ambient light drops rapidly
You’re constantly adjusting ISO, shutter, and flash power
Balance becomes a moving target
Why I Switched to a Deep Parabolic Softbox
A 28" parabolic gives structure. It carves out the face, adds punch, and delivers that dramatic falloff that pairs beautifully with darker aesthetics. We shot along a graffiti-covered gate that offered natural leading lines — and it ended up giving us one of the strongest portraits of the day.

Final Thoughts: Control the Light, Control the Scene
This entire shoot came down to one idea: Control your light, and the location becomes yours. You don’t need a polished studio. You don’t need perfect conditions. You need a plan, the right tools, and the confidence to make deliberate choices as you shape a scene — frame by frame. When you approach real-world locations with intention, even a forgotten warehouse becomes a stage for cinematic portraiture.
If you found this breakdown helpful and want more in-depth lighting guides, behind-the-scenes lessons, and real-world problem solving; check out the YouTube video above for the full walkthrough.


Comments