
White Balance for Portraits: Keep Skin Color Consistent
One portrait looks warm, the next looks cool, and you haven't moved your subject. Or one side of the face looks blue while the other looks orange. Before you spend an evening nudging sliders, separate two problems: the camera's color interpretation and the light actually reaching the person.
I'm Austen Hunter, the photographer behind Austen Hunter Photography. I like a portrait workflow that leaves fewer surprises for editing. White balance is part of that, but a single setting can't make every mixture of light behave like one source.
Key Takeaways
|

What Does White Balance Do?
White balance adjusts how the image represents the color of the illuminating light. It helps a neutral surface appear neutral rather than strongly blue, amber, green or magenta. It is a starting point for believable color, not a command to make every skin tone the same.
Camera presets such as daylight, shade and tungsten are useful starting points. Auto white balance estimates a setting from the scene. A custom reference gives the camera information from a neutral target photographed under the relevant light. Canon's portrait settings guide discusses matching white balance to the lighting and then refining the result.
Start With the Light on the Face
Place a suitable neutral gray target in the same light as the face for a reference frame. Avoid glare, deep shadow or clipped highlights on the target. Follow your camera's instructions if you're using that photograph to set custom white balance; the exact procedure varies.
A white shirt isn't always a reliable neutral reference. Its fabric may be tinted, reflecting a nearby surface or too bright to retain useful detail. Skin is not a neutral gray target either. Use the reference to establish a starting point, then check that the person and scene look believable.
Choose a Setting That Fits the Session
Situation | A Practical Starting Point | What to Watch |
|---|---|---|
Moving through changing light | Auto white balance, with reference frames when possible | Color may vary across the set |
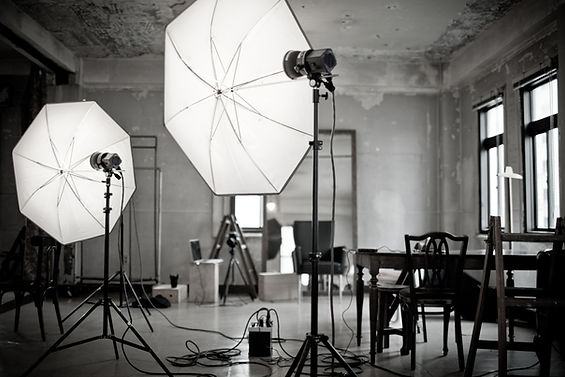
A consistent studio setup | A checked preset, Kelvin setting or custom white balance | Recheck when a light or modifier changes |
Daylight mixed with room lights | Identify which light reaches the face | One global adjustment may not correct both sources |
A warm sunset portrait | A neutral reference plus a deliberate warm finish | Don't remove the atmosphere just to make everything neutral |
There isn't one “best Kelvin for skin.” Light sources, modifiers, reflected color and the look you want all affect the decision. If you keep the setting fixed while the light changes, consistency of the number won't guarantee consistency of the result.

Fix Mixed Light at the Source When You Can
Picture a face lit by a window on one side and a warm room lamp on the other. Cooling the entire image to reduce the lamp's orange cast can make the window side bluer. That is a lighting mismatch, not proof that you haven't found the magic setting.
Where you have permission and control, turn off the competing light, move the subject or use compatible sources. A gel can help bring flash closer to an ambient source, but it won't automatically solve every LED spectrum or reflected color. Take another reference when the arrangement changes.
My natural-light portrait guide helps with placement. If you're introducing a flash, use the outdoor flash workflow to establish exposure as well as color. Brightness and white balance are separate decisions.
Refine Temperature and Tint Without Chasing Every Frame
In a RAW editor, temperature adjusts the blue-to-amber balance; tint addresses green-to-magenta shifts. Adobe's Camera Raw color guidance explains those controls and the white-balance selector. If the image looks green, moving temperature alone may not be the right correction.
Choose a representative image from one lighting setup. Use the reference, inspect the face and neutral objects, and make a restrained adjustment. Sync that starting point to images made under the same light, then review them. A move from shade into sun deserves a fresh check.
“Consistent skin color starts with paying attention to the light on the person. A reference frame saves guesswork, but your eyes still need to check the finished portrait.” — Austen Hunter
Give Yourself Useful Editing Latitude
RAW capture lets you revisit the white-balance interpretation more flexibly than a finished JPEG. It doesn't repair every lighting problem, restore clipped color information or make incompatible sources identical. My RAW vs. JPEG guide explains that workflow choice.
Check exposure before judging color, and avoid making decisions from a display with a temporary warm night-view setting. If important highlights look clipped, my histogram guide can help you evaluate the capture before trying to fix its color.
Frequently Asked Questions
Is Auto White Balance Bad for Portraits?
No. It can be a practical choice in changing light. Review the results and capture a reference when possible, particularly if several portraits need a consistent finish.
What Kelvin Setting Should I Use for Portraits?
Start with the light on the subject rather than a universal number. Use a relevant preset or neutral reference and check temperature and tint. The desired mood also matters.
Can RAW Fix Mixed Lighting?
RAW provides flexibility, but one global white-balance change can't independently correct differently colored light on different parts of a face. Simplifying the light during capture is often easier.
Should I Click the White-Balance Eyedropper on Skin?
Use a known neutral reference instead. Skin has its own color and is not a neutral surface. After setting the reference, judge the portrait as a whole.
Build a More Consistent Portrait Workflow
On your next session, take a reference when the light changes and compare a small set before applying edits to everything. For the bigger picture, my portrait guide connects color decisions with lighting, composition and preparation.


Comments