
Off-Camera Flash for Outdoor Portraits: Balance the Face and Background
Updated: 3 days ago
You get the sky right, take the portrait, and the face is too dark. Brighten the exposure and the sunset disappears. Off-camera flash gives you another way to work: decide how the scene should look, then add light where the person needs it.
I’m Austen Hunter of Austen Hunter Photography, a working portrait photographer and 2024 Navy Civilian Photographer of the Year. Here’s the order to try, with a few gear choices explained along the way.
Key Takeaways
|
Set the Background With the Flash Off
Choose your composition and decide how much background detail matters. Pick an aperture for the depth of field you need, an ISO that suits the light, and a shutter speed that controls motion while staying within normal flash sync.
Take a test frame with the flash off. The person may be dark at this stage; you are deciding how the existing light should look. Check important highlights rather than forcing the entire scene to a particular brightness. My histogram guide explains what that check can and cannot tell you.

If those controls still feel connected in confusing ways, start with the exposure triangle.
Add One Light Before Adding Complexity
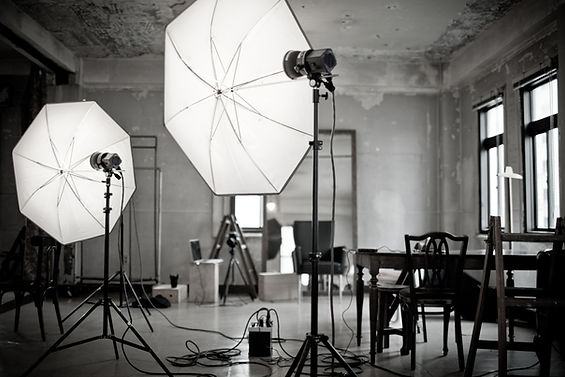
Place the flash so its direction suits the face and pose. Start with a manageable distance and a secure stand, then make a test frame. With manual flash, increase or decrease output until the face looks right. With TTL, use flash exposure compensation when the automatic result needs adjustment.
Watch the shadows under the nose and chin. Moving the light can solve a problem that adding power will not. If a softbox still looks hard, its apparent size and placement may be the issue; my softbox lighting check walks through that.
A modifier outdoors also catches wind. Keep equipment attended and properly secured, and stop using the setup when conditions make it unsafe.
“The goal is not to make the flash obvious. It is to give the face the light the photograph needs.” — Austen Hunter
Know Which Control You Are Changing
The table assumes manual exposure, fixed ISO, and conventional flash at or below normal sync speed. TTL and high-speed sync change the interaction.
If You Change… | Check This Result |
|---|---|
Shutter speed | Ambient brightness and motion blur change; the brief normal-sync flash contribution is usually largely unchanged. |
Aperture or ISO | Both ambient and flash brightness change. Recheck the face as well as the background. |
Manual flash power | The flash-lit areas change while the ambient exposure settings stay the same. |
Light-to-subject distance | Brightness, falloff, and apparent source size change. Retest after moving either the light or the person. |
Choose Equipment Around the Photograph
Start with a flash that can light the face at the aperture and distance you want to use. If a speedlight already does that, use it for these tests. A larger strobe becomes useful when you reach an actual output limit, especially after adding diffusion or enabling high-speed sync.
I may earn a commission from some of these links.
The original Godox AD400Pro is one of the strobes I use. It is a battery-powered option for taking a light on location. Before choosing it, consider the weight you want to carry and whether the flash you own already gives you enough output. This link is for the original AD400Pro, not the Pro II.
The trigger needs to match both the flash system and your camera. I use the Godox X3-C for Canon. The C version is the Canon variant; choose the matching version for another camera system and check Godox’s current camera compatibility information before ordering. A matching brand name alone does not establish compatibility with every camera or shutter mode.
For a modifier, think about the light you want and how you will support it outdoors. The Glow EZ Lock 34-inch silver beauty dish is another item I use. Check the mount and the adapter on your flash before pairing them. Changing the modifier’s position or distance may do more for the portrait than buying another one.
Choose a stand for the actual light-and-modifier combination, following its manufacturer’s load and setup guidance. Secure it for the conditions, keep it attended and pack the modifier away when wind makes the setup unsafe.
“Buy for the limitation you can see in a test frame. More power won’t fix a light placed in the wrong spot.” — Austen Hunter
Use High-Speed Sync Deliberately
If you want a wide aperture in bright daylight, the ambient exposure may require a shutter speed faster than normal sync. Compatible high-speed sync can make that possible, but available flash reach drops as shutter speed rises. Canon’s high-speed sync guidance explains that tradeoff.
Check your own camera, trigger, flash, and shutter-mode compatibility. There is no universal sync speed or power setting. Alternatives include a different location, a smaller aperture, or a suitable neutral-density filter, each with its own consequences.
Recheck When the Scene Changes
Clouds move. Sunset gets darker. A small change in posing can bring a face closer to the flash. After a meaningful change, check the background, face, shadows, and sharpness again.
In the Fort Pickens photographs, compare the finished portrait with the working view: the position of the modifier, the couple and the sky all belong to the same decision. My military couple beach-to-sunset breakdown follows the session from natural light into flash. Use it to think through placement and framing before choosing settings for your own location.
Frequently Asked Questions
Do I Need a Large Strobe?
Not for every situation. The required output depends on ambient light, distance, modifier, aperture, and whether you use high-speed sync. Test the equipment you have before buying more.
Should the Background Always Be Underexposed?
No. Choose its brightness for the photograph. Flash can be subtle fill in a bright scene or a stronger source in a darker treatment.
Can I Learn This With One Light?
Yes. One light makes it easier to see how placement and output affect the face before introducing another variable.
Which Trigger Should I Buy?
Choose a trigger that supports your camera and the flash’s radio system. Confirm the exact model and the functions you need, including TTL or high-speed sync. Camera-brand variants are not interchangeable simply because they share the same product family.
From the Learn Shop
Put the Lighting Choices Together
For the wider process—from subject and background to posing and light—continue with my portrait photography guide.


Comments