
Photographing a Military Couple: From Beach Portraits to Sunset Flash
A couple arrives ready for the beach, but their photographs in uniform are the reason they booked. You have about an hour and a half, a nearby fort full of backgrounds, and a sunset you want to use. Where do you spend your time—and where do you keep things simple?
That was the practical question behind my session with Austin and Caitlin at Fort Pickens in Pensacola. I’m Austen Hunter of Austen Hunter Photography, an Air Force veteran and the 2024 Navy Civilian Photographer of the Year. Here is how I approached the session, from natural posing to the flash adjustments I made as the light faded.

Key Takeaways
|
Start With the Photographs That Matter to the Clients
Austin was nearing the end of his Air Force service, while Caitlin was starting her Navy career. He planned the session during a Labor Day weekend visit so they could document a time when both were still serving. That gave me a clear priority: protect enough time for their portraits in uniform.
They arrived dressed for the beach, so we started there. I used natural light for that portion. I could have set up flash, but doing so would have taken time from the service-dress photographs still ahead. Choosing a simpler setup let me keep working with them and move on while we still had light.
That is a useful question to ask before adding equipment: what does this setup improve, and what will it cost the rest of the session? I wanted a strong beach sequence without turning it into the whole evening.

Make Small Posing Adjustments Before Adding More Poses
Austin and Caitlin were already holding hands, hugging, and leaning into each other. Most of my direction was small: bring your heads together, move a hand, turn slightly toward each other. I wanted their connection to remain visible instead of replacing it with a rigid routine.
For photographers, the lesson is to look before you direct. Find what the couple is doing comfortably, then improve the camera-facing details. Watch the space between their bodies, the placement of hands, and whether their faces remain visible. Give one adjustment at a time so they can stay engaged with each other.
This couple needed very little prompting. Another couple may need more guidance, and that is part of the job too. Their comfort should determine how much you direct.
“The best setup is the one that helps me make the photographs this couple came for.” — Austen Hunter
Build Variety Into the Route Through a Location
Fort Pickens gave us brick walls, archways, stairs, and an upper deck overlooking the surrounding area. During the uniform portion, we moved from the outside wall to the front arch, farther inside for seated photographs, then up the stairs for the final portraits.
That route let the backgrounds change without repeatedly moving back and forth. I also varied how much of the surroundings I included. A wide frame can explain where the couple is; a closer frame can give their expressions or uniform details more attention.
Decision | What It Added to This Session |
|---|---|
Photograph the beach in natural light | A relaxed first look while preserving time for the uniform portraits. |
Move from the outside wall through the fort | Different backgrounds with a progression that was easy to follow. |
Alternate wide frames and closer details | A sense of place alongside expressions, ribbons, and the name tape. |
Include individual portraits on the upper deck | Photographs of each person’s service as well as their relationship. |
My Canon EOS R and RF 28–70mm f/2 let me move between those wider compositions and closer photographs without changing lenses. That flexibility mattered more to me here than committing the whole session to one focal length.

Before the posed uniform portraits, I also photographed them helping check each other’s uniforms and ribbons. Later, we tried holding their shared name tape toward the camera. Those small details helped make the gallery specific to this couple. My military portrait client-preparation guide covers the planning that supports this kind of session.
Keep the Flash Setup Manageable
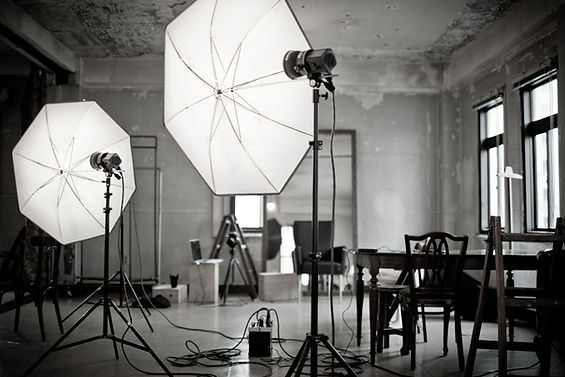
For the flash portraits, I used a Godox AD300 with a 34-inch Glow EZ Lock softbox and a Godox X2 wireless trigger. I worked with manual flash power. The beach sequence was natural light; the flash setup belongs to the uniform portion of this walkthrough.
I care about the relationship between the light, the people, and the background. A modifier name alone does not tell you what the lighting will look like. Its distance and angle matter too, which I explain in why a softbox can still produce harsh-looking light.
The upper-deck portraits gave me a chance to use a low camera angle and keep the cannon and sky in the frame. In the photograph with Austin standing and Caitlin looking toward him, that angle gives him a strong presence while retaining the location.

Adjust for Fading Daylight Without Losing the Background
Near the end, the background was getting darker quickly. If I had left everything unchanged, the flash-lit couple would have remained bright while the surroundings fell deeper into shadow. I wanted to retain some of that evening atmosphere.
For these later portraits, I kept the shutter around 1/200 second because the couple was moving. I opened the aperture and raised ISO as needed, then reduced manual flash power to keep the subjects from becoming too bright. ISO affects the recorded brightness of both ambient and flash illumination; it is not a background-only control.

Two actual frames show how my camera settings changed:
Photograph | Shutter | Aperture | ISO |
|---|---|---|---|
Earlier upper-deck portrait beside the cannon (photo 56) | 1/200 second | f/2.5 | 200 |
Final sunset dip (photo 75) | 1/200 second | f/2.2 | 1000 |
These are the settings recorded for those photographs, not a universal recipe. The light changed between frames, and I adjusted flash output along the way. The camera settings alone do not tell you the flash power or the exact light-to-subject distance.
As a simple practice example, doubling ISO while keeping aperture and lighting unchanged adds one stop to both contributions. Halving manual flash power can offset that increase on the flash-lit subject. On a real shoot, keep checking the result because the ambient light, distance, and pose may also be changing.
A slower shutter is another way to gather more ambient light at normal flash-sync speeds, but I did not want to keep lowering it while they were moving. Neither 1/200 second nor a flash guarantees a sharp frame in every situation. Check the actual photograph, particularly where ambient light contributes to the moving subject.
Check the Histogram, Then Look at the Photograph
A bright camera screen can make an image feel brighter than it is when you are standing in the dark. I check the playback histogram as well as the image itself. With Caitlin’s white uniform and the darker background, I wanted to keep an eye on bright detail and the shadows.
Canon’s explanation of brightness and RGB histograms describes how they show the distribution of tones and individual color channels. Use that information to investigate possible clipping. There is no single histogram shape that proves a sunset portrait is balanced, and the graph does not tell you which part of the scene a tone belongs to. Look back at the uniform, faces, and sky before deciding what to change.
Questions About This Session
Why Didn’t You Use Flash on the Beach?
I wanted to make the beach photographs efficiently and preserve time for the uniform portion. Natural light suited that decision on this session. It does not mean flash is a poor choice for beach portraits.
Does Raising ISO Only Brighten the Background?
No. With other settings unchanged, it brightens the recorded ambient and flash contributions. If the background needs more brightness but the flash-lit subject already looks right, recheck and adjust manual flash power after raising ISO.
Should I Copy These Exact Settings?
Use them to understand the decisions, then meter and review your own scene. Your ambient light, subject movement, aperture needs, and flash placement will differ.
Support More Session Breakdowns
If seeing the decisions behind a real client session helps your photography, you can support this work through my photography stickers. AHP Learn also has contract templates and other resources for photographers preparing their own paid sessions.


Comments